Friday, November 11, 2011

Simplifying RSS feeds with Yahoo! pipes

About two years ago a friend finally convinced me to start using an RSS reader to manage the list of web sites that I was browsing on a daily basis. RSS stands for Really Simple Syndication and is a very lightweight way for a web site to list it's content as it's updated. You'll often see little icons like this that denote that a RSS "feed" is available

RSS Icon
I'd tried using RSS feeds before with Firefox, but the interface is not very good. It basically turns every feed into a tree of bookmarks and you've got to scan your bookmarks to see if there is new content. Easier than surfing to a bunch of sites, but not a lot.

Enter Google Reader, a dedicated RSS feed reader that looks and acts a lot like GMail or any other e-mail reader. Google Reader gives you folders that all your feeds are in and an "Inbox" that lets your see what's there. You click on a title to read it and when you've read everything in a feed, a group of feeds, or your whole list of feeds you click "Mark all as Read" and, viola, your inbox is cleared out. The interface looks something like this:
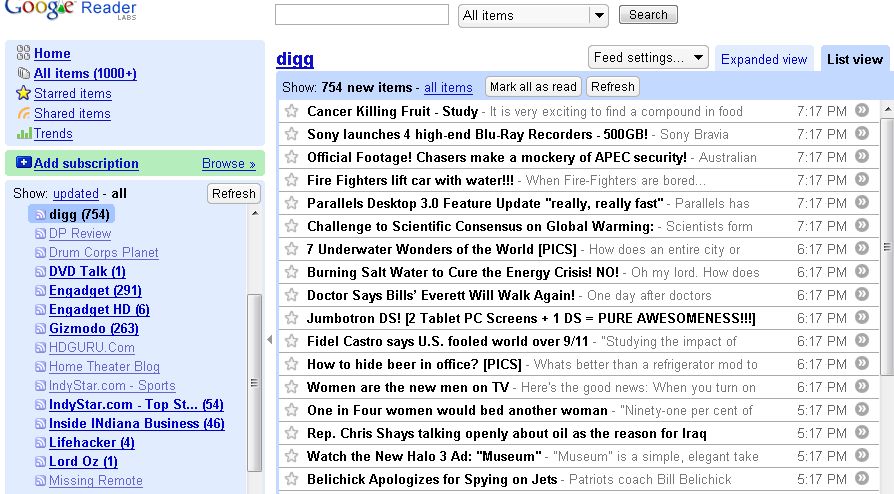
Google Reader. This is a slightly older pic, the interface looks a little different and this person has no folders of feeds set up.
So, it's all well and good. You can sign up for hundreds of feeds, peruse thousands of articles on the web every day, and spend very little time doing it. Google Reader tells you what articles of a feed you read. For some feeds, I read almost 100% of the articles, for others, less than 10%.

So all was well and good for a year or so, but I increasingly wanted something a little more flexible. Two cases in point:
  1. I like to read a number of opinion columnists. Several of them work for the NY Times. They each have their own feed (see here for a list of all NYT feeds), but that would mean subscribing to several feeds. While it's easy to mark everything read, marking some things read while leaving others unread is a bit of a pain. The Times also supplies a feed of ALL it's columnists, but it doesn't give any indication in the feed of who wrote the column. I have no interest in Maureen Dowd, but I can't filter out what she wrote without clicking through to a web page to see if she wrote it. Plus there are columnists for other newspapers I also want to read.
  2. There are a number of "great deal" type RSS feeds out there, but they suffer from the same problems. Either they mix hard drives and cereal in the same feed (guess which one I'm more interested in) or they have lots of very detailed feeds, so I might want to follow 10 of them.
So I started looking around for a way to aggregate a bunch of feeds into something that Google Reader would see as a single feed. After finding a few simple services, I stumbled upon Yahoo! Pipes, which is a very full featured way of doing this. Pipes gets its name from the Unix concept of pipes, which is a way of combining a number of simple programs each feeding it's output into the input of the next program. You can do very useful things very quickly this way. For instance, you might do this: cat file.txt | split | sort | uniq -c | sort -n -k 2 which would take a file, split it into individual words, sort them, remove duplicates and count how many times each word is used, and finally sort again by how many times each word was used. You'd end up with an ordered list of how often you used each word.

Pipes extends this concept to working with RSS feeds and providing an RSS feed on the back end. So the simplest thing I can do is just aggregate a bunch of feeds into one. For my columnists I go one step further. For each feed, I prepend the name of the columnist to the title before aggregating it, so I see entries like "Brooks: Let's All Feel Superior" and I never see "Dowd: Why I Wrote Another Snarky Column". So you can see what I'm talking about, here is my columnist feed.

The best part of working with Pipes is that the editor is graphical where you drag little boxes around and connect them by drawing pipes from the output of one box to the input of another. At the bottom of the screen is a debugger that will tell you the output of each box. This video demonstrates the basic concept, although it's a bit dry.

For my deals, I took it another step forward. I do something similar breaking down things by sources and only the sources I want. But that are also things I am actively looking to buy. So I put together a massive feed of about every deal RSS out on the web. Then I can split that feed apart and search items for matching patterns (like the next camera I want to buy) and recombine those into items in my overall deals list prepended with ALERT! Basically, I've got this machinery scouring the web looking for my next camera, all with one time setup. I actually do this by using Yahoo! Pipes to chain together three existing pipes into one (it's easier to make some things modular). Here is my final deals feed.

One issue I did find with Google Reader plus Pipes is that Google Reader does not fetch a feed when you decide to read it. It fetches feeds periodically and caches them. And it decides how often to do this based on how many other people follow the same feeds. Since my feeds basically have an audience of one, Google would like to fetch it only every few hours. However, if you select only one feed and hit the refresh button, Google will re-fetch that feed and display it. For some things, a few hours old is fine, but for time sensitive information, this forced re-fetch is nice. The only downside is having to hone in on one feed before using it (refreshing everything won't trigger it).

Pipes can do a lot more, like turning web pages without feeds into feeds, processing data in other formats, etc. I'm sure I'll be exploring that in the future, but for now I'm really happy that I've been able to reduce the number of feeds I follow, reduce the number of items I see, and increase their relevance. If you are a regular RSS feed user and feel like they are getting hard to manage, take a look at Pipes.

Saturday, July 30, 2011

My Photo Workflow IV: Organizing

In my second post, I explained how I use Photoshop Lightroom to filter and process my photos. Once that's done, I've still got some work to do before my photos are "finished". Most of what I do is organizing. Making sure that each photo is well described and that I can find it again later. And that if want to show someone a group of photos, I'm not going to bore them either looking for it or with a bunch of stuff they don't want to see. I may like all 500 photos I took of the ruins of Egypt, but no one else really does.

Lightroom is a photo processing and organization tool and now is when the 2nd half of that really comes into play.

The first thing I do is start assigning keywords to every photograph. A lot of my photos are diving related, so I assign a keyword for the dive site where it was taken. I use hierarchical keywords, so for dive sites I have something like "Dive sites / Country or State / Site". This way I can correlate the same pictures taken days or years apart at various locations. When photos have animals in them, I do something similar for that. Those hierarchies can run six or more slots deep, for instance: "Animals / Invertebrates / Mollusks / Gastropods / Sea Slugs / Nudibranchs / Ringed Chromodorid" describes this very nice little animal:
Ringed Chromodorid
Unfortunately, as time goes by these hierarchies tend to get deeper because each step gets enough entries that I split it apart if I can.

I also use keywords (or tags) like this for various kinds of buildings, vehicles, styles of photos (sunrises, silhouettes, etc), and all the various people who I've photographed. Using all these various keywords, I can generally find what I'm looking for pretty easily even if I can remember exactly when or where I took it.

I also use the "Title" and "Caption" fields in Lightroom to describe in words what the photo is. At a minimum, it just contains what is in some of the keywords. I'd like to just set the title or the caption, but unfortunately some web services read the title and some read the caption. When I can, I use the caption to make a longer description of the photo.

Finally, I use Lightroom's ratings and color labels to categorize my photos. I used these before during my development steps to figure out where in the process I was, but now I'm assigng final ratings. I use between one and five stars to rate my photos with the following meanings:
  1. Sometimes I'll take photo of a sign or text to remind me what I have a picture of. Or maybe a photo of a rare (to me) animal that I want to document but the photo is so poor I never want anyone else to see it.
  2. These are OK photos, but they are too similar to something ranked 3 stars. I don't want to discard it, but it's of limited use
  3. These are my good photos. I might use 3 star and above photos to make a web gallery or I might use 4 star photos. I keep a lower resolution of all my 3 star photos on my laptop so they are almost always with me. This is about 50-75% of the photos I keep.
  4. If I have too many 3 star photos, these are the photos that go into my web galleries. I also keep an even lower resolution copy of all of these photos on my phone, like people used to do with photos in their wallets. This is well under 10% of my total photos.
  5. These are the best photos I've ever taken. If I enter a contest, this is where I look first for something to submit. These are less than 1% of the photos I've taken, so at the moment, there are less than 100 in this category.
I also use the Lightroom's color labels for some things:
  • Green: These are my keepers that I rate as I explained above
  • Yellow: These are "virtual copies", which means more than one way to process an image. For instance, maybe I have a color version and a black and white version of the same photo. 
  • Blue: A photo used as a white balance reference. Sometimes while I'm shooting I will take a quick photo of something white or gray so I can calibrate photos taken in the same time or place later. These are useful in the workflow but not anything you'd ever want to look at
  • Purple: A series of photos that I might later want to stitch together in a panoramic or put together into an HDR image. So far I haven't really done much of this, but I have plans....
So far everything I've done has been on the RAW files and is non-destructive. Only at the end do I turn my photos into JPEG files that I can share. Lightroom calls this "Exporting". I have several collections and presets set up to make several sets of my photos
  • My basic collection is to export a full resolution copy of every photo. This stays on my home computer and my backup drives
  • I export every 3-star and above photo into a resolution that's about the same as my laptop monitor. This gives me a library of all the photos I actually want to share that I can easily put on my laptop. But it's only a few percent of the size of my full library with all the RAW files
  • I export an even smaller version of my 4 & 5-star photos. This makes a nice "wallet" that I can store on my iPhone without taking up much space at all (a few hundred MB)
  • Finally, I export another version that's sized well for Picasaweb, Google's online photo site. I put a copyright watermark on these photos. 
I have a number of Lightroom "Smart Collections" set up so that if I change a photo, it lets me know I have to re-export it.

So now that I'm done processing and organizing my photos (and really the organizing doesn't take so long) I've got all my photos in a very easy to search database. Recall from my first post that I also have tagged all my photos with the GPS coordinates where they were taken too, so I have a lot of powerful information at my fingertips. And because, as I explained in that post as well, I always save the XMP file alongside my RAW and JPG files. This allows me to manipulate the data in programs other than Lightroom, move to a different organizing program, or write my own scripts to mine the data.

Well it took longer than I thought to explain everything I do to my photos, but in my defense I've had a lot of photos to process!


Wednesday, April 6, 2011

My Photo Workflow III: What does it mean to "Photoshop"?

In my second post, I described my "post-processing," or how I turn a RAW file from my camera into a final image. The reason I use RAW mode on my cameras is that all these adjustments can be made from the original data, not the reduced data in the normal JPG files. And if I want to change something a few weeks or years later I can easily go back into Lightroom, tweak the one thing I want to change and regenerate the JPG.

In this post, I'll give some before and after examples for the adjustments I make. This all comes back to the question of "Do you use Photoshop?" As I already implied in the previous post, "Yes, but that can mean a lot of things." People often assume "Photoshop" means "cheating," "altering reality," or "making things up." But image processing is just another tool and you can put it to any number of uses.

One of the most basic adjustments that you can make to a photo is to change the white balance, or the color of the light. For instance, light on a cloudy day is bluer than light on a sunny day. In the days of film your photo lab would alter this in printing, but if you used slides you were stuck. They actually make different films for different lighting (outdoor, indoor, fluorescent). Fortunately with digital, we can adjust this either at the time you take the photo or later. Since I use RAW it doesn't matter at all when I change it, so I just tend to leave it on Auto and deal with it later. If you are taking photos in JPG mode, you'll get slightly better results if you set your white balance to sunny or shady or whatever fits.

This concept is really important for underwater photography without a flash since water quickly absorbs nearly all the red light. Take a look at this photo below. On the left is what the original might look like, on the right is what it looks like when I've corrected it. You can see that the reds, which were almost lost, have been restored. When you see something like this underwater, your eye sees the red color, unlike the camera. (I picked an extreme example because the difference between sunny, cloudy, and shady light is much less pronounced.)
White balance illustration (Stoplight Parrotfish, Cozumel, Mexico)

Using the same photo as an example, let me illustrate another correction I make to my underwater photos. When you shoot through water, you tend to get haze due to dispersion within the water. This is basically like haze in the air, but because water is 800 times as dense, you get haze between you and subjects a few meters away (rather than a few kilometers in air). You can take some of this haze out by increasing the black level, or basically darkening the darkest parts of the photograph. You can see this below where I've done this on the right. (Look at the water to see the effect most clearly.)
Removing haze with black levels (Cozumel, Mexico)

This next photo is one of my favorites. This shows the effect of increasing the "Clarity" and "Vibrance" in Lightroom to get that warm, saturated film look. (I didn't change the white balance between the two.) The line down the middle is a little hard to see, but take a look at the photograph as a whole and you can see how much richer this simple adjustment makes the part of the photograph on the right.
Clarity and vibrance illustration (Lioness, Nakuru NP, Kenya)

Here's a simple example of using the targeted adjustment tool I mentioned in my second post. On the left is the original version of the photo. On the right I've "grabbed" the blue sky and made it darker (decreased the luminance) to look more like it appears to the eye. (Your eyes are much better than a camera at seeing a deep blue sky against a very bright snowy mountain.) You'll notice the line between the two photos is very distinct in the sky and all but invisible in the white parts. That's because I've only adjusted the blue parts of the photo.
Targeted adjustment tool illustration (Chamonix, Switzerland)

This is a much more extreme version of the same principle and this is one of a handful of photos where I've really altered something. The air in Cairo is horribly polluted and a clear day with a blue sky over the Giza pyramids and Sphinx is incredibly rare. In fact, many postcards use photos taken a decade or more ago. So short of living in Egypt for years, there is no way I could have gotten a photo of the Sphinx backed by a beautiful blue sky. So I cheated. :-) I adjusted the white balance a little to get some blue into the sky. Then I used the Lightroom's targeted adjustment tool to adjust the darkness and hue of the sky to get something that looked somewhat natural.
Targeted adjustment tool illustration (Sphinx of Giza, Cairo, Egypt)

Here's a good example of noise reduction. This is a 1:1 blow-up of part of a picture. It's shot on my small underwater camera (Canon G10) at ISO 800, which I would never have done except that I had so little light to work with, I had no choice. On the left is the image as it comes out of the camera. On the right is after a moderate amount of noise reduction and sharpening from Lightroom. The quality of the noise reduction in Lightroom 3 is much improved over previous versions, so for photos like this, it was almost like buying a new camera. It still doesn't look great, but it's a major improvement and when it's not blown up like this, this photo actually looks decent.
Noise reduction illustration (Hilma Hooker shipwreck, Bonaire)

So, these things are the majority of the image manipulations I do in Photoshop Lightroom. I left out a few, like small (one stop or less) exposure corrections, removing dust and back-scatter, or fixing red-eye when using a flash. The point, for me, is that while a tool like this can help make a photograph somewhat better, it can't make a photograph. It is still the technique, thought process, and, yes, luck that I've had that goes into making the photo what it is. Aside from the Sphinx picture, every photo I've ever taken fits that category. On the other hand, I didn't paste a sky with clouds into that photo. It is also much easier to take a few extra seconds in taking a photograph to capture the best photo you can than it is to "fix" things in Photoshop, so I try not to be lazy in that regard.

So that's what I use image processing software for. What I don't use Photoshop or Lightroom for, and what I gather is many people's perception of the program, is things like this. I think I may have once removed a powerline from an open sky. I don't have anything against extensive "Photoshop"ping per se, but in my opinion when it's used to alter reality and it's not obvious that reality has been altered, it should be disclosed. There are many ways to use these tools and all of them can be valid, the important thing is not to deceive the viewer. But remember, photography is an art and there is now a continuum of methods and styles from raw photojournalism at one extreme through to things like Sin City and Avatar on the other.

Hope this clears up what I do and why.

Coming later is my fourth post explaining how I organize my photos.

If you are wondering how I create these photos with two halves, I use a couple of programs from Imagemagick:

To split a photo into two parts (overwriting the original):
mogrify -path test2 -format jpg -crop 50%x100% +repage *
and to stick two pieces back into one
montage 469d2b37-2-0.jpg 469d2b37-1.jpg -mode Concatenate -tile x1 lion.jpg

My Photography Workflow, Part II

I mentioned earlier that I often get asked "Do you Photoshop your photos?" and that I don't really like the question. But I didn't answer the question either. This post is the second of four planned posts that outline exactly what I do do with my photos. The next post will show some before and after photos.

So to directly answer the question "Do I Photoshop my photos?", the answer is "sort of." :-) I don't actually use Photoshop which is typically the program people think of and comes with Adobe Photoshop CS5 and is geared towards both photographers and graphics designers. I do, however, use a program with some of the same functionality called Adobe Photoshop Lightroom, or Lightroom for short that is really only suitable for photographers.

Lightroom is actually a pretty good name because it evokes the concept of "darkroom." This means that Lightroom lets you do things on the computer that, with film, you needed a darkroom to do. Some of these manipulations are able to "fix" specific problems with photographs are some are ones I use on nearly every photograph. Lightroom is also about much more than image manipulation, it's also about organizing and managing your photographs. I'll deal with that more in the final post in this series.

The first thing I do when I re-import my photos into Lightroom (described at the end of my first post) is set some Lightroom presets. Because I shoot everything in RAW mode, the default look of the photos is rather dull. I change this by setting Lightroom's "Clarity" and "Vibrance" settings to about 50 each. Clarity adjusts the contrast of the photo, but increases the contrast of low contrast regions more than high contrast. Vibrance does something similar to the color saturation, increasing the saturation of dull colors while leaving the very bright, colorful parts of the photo unchanged. There is a very nice discussion of these settings with examples here. I also set my Adobe camera profile to "Manufacturer Standard" which is a bit more colorful than the default. The effect of all these settings is to make digital photographs look more like film, especially the widely used Fuji Velvia slide film, rather than a strictly faithful representation.

The second preset I apply to all my photos is to correct the distortions of my lenses. No lens is perfect and they all distort somewhat. This is especially pronounced with wide angle lenses. Adobe has very good profiles for a lot of lenses, so if I have a profile for my lens, I make the correction. The last set of presets I apply to every photograph is some noise reduction and sharpening with a sharpening mask. The mask is used to apply sharpening to areas where the contrast is changing (like edges) and to not apply it to already smooth areas (like people's faces). The amount of noise reduction I apply depends on the camera used and the ISO value of the photograph. Lightroom makes it easy for me to apply these settings in a batch mode, so it's a very quick operation.

Now that I've done things with my photos "in bulk" I start a process where I scan through my photos multiple times doing the same step (or few) to each photo. I use Lightroom's colors (red and yellow) and numbers (0-5) to track which step I am on. When I reach the last photo, I start the next step on the first photo. The steps I take are:
  1. Reject any photos that are out of focus or obviously junk
  2. Set the white balance of the photos in groups (I select a whole bunch and set them to sunny or shady, etc) 
  3. If I've bracketed the shots (taken several at slightly different exposures), I pick the best exposure
  4. I often have several shots that are very close or identical. I pick one
    • This can be rapid fire shots of people trying to catch a good smile, or wildlife trying to catch a good angle, expression, etc.
  5. Adjust the exposure if needed
    • For underwater wide-angle photos this often means using the "Auto" exposure mode which takes a lot of the "haze" out of underwater photos by changing the black level
    • On land, this can be adjusting for high contrast situations and sometimes "fixing" an actual over or under exposure
  6. If needed, crop the photo and/or straighten the horizon
  7. Pick between similar shots (as opposed to nearly identical shots, maybe two photos of the same type of animal or scene on different days)
  8. Check and set the white balance individually if needed
  9. Check and set the exposure if needed. Especially check the highlights and shadows
  10. Clone out any visible dust on the camera's sensor or annoying back scatter for underwater photos
  11. Especially for high ISO shots, check the noise levels and add more noise reduction if needed
    You can see on my workflow that there are several points where I am filtering my photos, but I try to space those out so I don't get fatigued. In general I discard somewhere between 50 and 90% of the photos I take.  And while it may sound like a lot of work, I probably average less than minute of work for each photo I keep.

    On rare occasions I do a few other other touch ups. For instance, I will sometimes use the targeted adjustment tool to make a sky a little darker or bluer or to de-emphasize a distracting background. 

    There are two points I always keep in mind. First, most of the manipulation I do is to get a similar look to what we used to get from film and the manipulation that used to happen in photo labs when we brought in negatives for printing. Second, human vision is much more adaptable and subjective than the very accurate capture digital cameras are capable of: the human eye easily adjusts to light of different colors from sunlight, shade, etc. and it easily sees the detail in shadows even on a bright summer day. To make a photograph more accurately reflect that experience, it's sometimes necessary to adjust things away from the very linear capture of film or a digital chip. Photography is most often a way of capturing a mood or feeling rather than some objective (whatever that means) reality of a moment in time.
    In my next post I'll show some real world examples of this at work.

    Monday, April 4, 2011

    Twonky Media Server and Western Digital TV Live Plus

    I've written a couple of times about my WD TV Live Plus media player, growing to like it a bit more all the time. The biggest breakthrough in usability was installing the Mediatomb server software on my home media server.

    After being pointed at the Western Digital MyBook Live World family of products (why are these names so long?!), I had two thoughts: first, those look really cool and could easily have replaced my media serving hardware, especially with the online instructions to turn it into a webserver. Second, what is this TwonkyServer and how does it compare to Mediatomb?

    Fortunately, TwonkyServer has a free trial period and is Linux friendly, so I was able to download it and play with it. Basically it's just another UPnP server and doesn't do anything fundamentally different that Mediatomb. But it does have some nice features and it's cheap, just $20. So bottom line is, I will be buying it. Here's a rundown:
    • It should go without saying, but this is not free or open software so if this matters to you, it's not an option
    • TwonkyServer serves up .m3u playlists just fine. For Mediatomb, it didn't do this in my Ubuntu install. There was some discussion of recompiling with JavaScript support and suggestions that this might be improved in future versions of Ubuntu, but it wasn't something I wanted to mess with.  TwonkyServers playlist support is good enough that it actually generated playlists out of .m3u files that didn't have the correct prefix on the paths.
    • TwonkyServer has an ArtistIndex menu selection that gives things like "ABC" "DEF" etc.,  meaning less scrolling to find what you want if you have lots of artists. I do, so I found this useful.
    • Even more useful, it deals with "Various Artists" albums in an intelligent way. I have a lot of soundtracks, collections, and especially five years worth of South By Southwest collections, so I have hundreds of artists in my collection with just a song or two. One simple configuration on Twonky's configuration web page, and all these spurious artists disappear and those files are accessible by Album or other metadata, but not by Artist.
    • Twonky lets me access my songs and photos by rating (1-5 stars). I don't have ratings set on my songs yet but I do on my photos, so this is useful. It also understands my keywords from Lightroom (subject of a future post).
    • Twonky does some transcoding of things like YouTube and various radio streams, etc. I haven't explored this a lot as the WDTV Live Plus provides a lot of this through it's dedicated applications.
    • Finally, Twonky treats a file "folder.jpg" in a music folder as the cover art for an album. It may be that Mediatomb does this too, but this is handy.
    So, bottom line, TwonkyServer gives enough advantages over Mediatomb that will by buying it. I couldn't find anything that I liked about it less. It also seems quite stable. I had music streams running for days without incident.

    Tuesday, January 25, 2011

    Photo Workflow, Part 1

    I often get questions like "Is that Photoshopped?" when people see some of my photos. That's a loaded question in my view because the general perception is that somehow Photoshop is used for altering "reality." It certainly can be, but that's not generally the way it's used by photographers. So I thought I would lay out, in pieces, what I actually do with my photos once I take them.

    First, I shoot everything in RAW mode, both on my Canon DSLRs and with my Canon G10 that I use for underwater.

    The first thing I do is quickly import my photos into Adobe Lightroom. I use a setting under "Catalog Settings" to "Always write changes into XMP." Many people don't recommend this, but it's crucial to how I work:
    • I'm not relying on Lightroom's database. If it gets corrupted all the important metadata is in a little .xmp file that rides along with the image files
    • I can use other programs to manipulate the xmp file's metadata and import the changes back into Lightroom
    • I use Lightroom on two computers and this is an easy way, along with Unison, to keep things in sync between the computers
    After I have imported my photos, I now have an XMP along with each RAW file. Then I quit Lightroom.

    Recently I've gotten into geotagging my photos (adding information about where they were taken), so that's the next step in my process. If I remember, I track where I am with my iPhone. (When I'm scuba diving, the iPhone tracks the boat, and not me, of course.) The best application I've found for this kind of tracking is EveryTrail, but there are a number of apps for the iPhone and other devices. The important thing is that they output a GPX file that can be used in the next step.

    Next, I use a program called Geotag that will load up all the XMP files and the GPX file(s) and correlate them based on the time of when the photo was taken and where I was. Again, there are a number of programs that do this, but Geotag is the only one I found that runs on any computer (it's Java), is free, and works with XMP files (most like to use JPGs instead).

    If I don't have a GPX file describing exactly where I was at any time, I use Google Maps to take a guess and fill in requisite fields in Geotag.

    The last step, before I'm ready to begin filtering and working with my images, is to rename them all. Every camera maker seems to have a slightly different naming scheme and things like IMG_1234.JPG have a couple of problems. First, they can overlap if you take more than 10,000 photos (which I have). Second, I often use more than one camera on any given trip or gallery, so one camera may be at 1234 and the other at 4321. That means that alphabetically and chronologically things are in different orders. So I rename all my files. I use the script below, which renames things like 4c64de23. It's sort of gibberish, but each second of the day since 1970 has it's own code, so unless more than one photo was taken in the same second, it's guaranteed to be unique (it actually deals with that contingency too). The script renames all the RAW, XMP and JPG files, etc. that share a common root name. It's got options to work only with JPG files (like some of my galleries), to keep a backup JPG, and to just explain what it will do but not actually do anything.

    Once all the files are renamed, the last step in this part of the workflow is to go back into Lightroom and choose "Synchronize Folder" for the folder containing all the photos. This is the same step I take if I change something on one computer and want to work on it on another. This reads all the files in fresh, taking all the metadata and development settings from the XMP files.

    In the next post I'll start to answer the question I posed at the beginning: "Do I Photoshop my photos?" (At this point I haven't actually done anything to the images themselves, just done a bit of organization.)

    Update: With the release of Lightroom 4, which includes geotagging, the first part of my workflow can be simplified a lot. Basically I can rename the photos as soon as I put them on my computer, import them into Lightroom, and do the same sort of geotagging with the GPX file directly in Lightroom's Map module. Or just drag and drop the photos onto the map if I don't have a GPX file.

    Friday, January 21, 2011

    Further thoughts on the TV Live Plus

    After a couple of weeks of playing with my WD TV Live Plus media player, I've got more experience with it. It's definitely a neat little device that I'll be keeping.

    In my first post, my major concern was the functionality of the music interface. I had thought that I would have to do some hacking on my Samba server to mimic playlists of all my music and artists, etc. But it turns out that directly attached hard drives or network shares (Samba or Windows network sharing) are not the only options. The other possibility is a UPnP server which is specifically set up for media sharing. Basically, the server knows all the meta-data like the artist and genre of a song, etc. and presents that to the player.

    After an upgrade to my server from Ubuntu 6.06 to 10.10, I was able to install Mediatomb, a UPnP server for linux. After turning on the UI and turning off data storage caching (avoided database errors for me) in the config file, I had a very functional set up. Now the music interface is much better. I get a browseable menu with "All music", "Artists", "Genre" etc that I can get a much better view of my music.

    The WD TV Live is not without it's issues though. First, an inexcusable in my view, is the lack of gapless playback. Every modern music player does this and that it does not is puzzling. Basically what this means is that even when playing two tracks from the same album, there is a slight (fraction of a second) gap between one song ending and the next starting. This is really irritating on live albums or "album rock" like Pink Floyd's "The Wall" where one track runs right into the next. Worse is that not only is there silence, the digital output is momentarily turned off, so sometimes there is an additional delay (and missing sound) while my digital receiver re-syncs to the output. They've known about this problem for a long time and claim to be working on a fix. We will see.

    The second annoyance, which I have solved, is that the photo browser (also using UPnP) was showing most of my photos as very small tumbnails instead of filling the screen. Strangely my portrait photos were filling the screen. The solution, as it turned out, was to resize all the photos. As long as the photos are not too wide, they show correctly. I resized everything to 1080 pixels tall (HD resolution) and it's fine now. This was no problem for me since I already have a reduced size group of photos that I keep on my laptop rather than carting around the full sized collection.

    The third thing, also purportedly being worked on, is that the Netflix streaming doesn't output the nice Dolby Digital 5.1 audio and only supports standard stereo. Supposedly a fix is coming for this later this year.


    Saturday, January 15, 2011

    Downloading all of South By Southwest

    One of my annual traditions is to download all the preview music from the South by Southwest (SXSW) conference in Austin, TX. Then I can listen to it at my leisure and find new artists I like. Every year, they change the website slightly and make it a bit harder to do. In fact, last year they did this shortly after I downloaded everything, so maybe they are on to me.

    Music for SXSW 2011 is already appearing on their site (the festival is in March). Over the next few months I'll update my collection and figure out what I like and don't like. So here's the quick and dirty script I worked out to grab everything. This should work on any unix-like OS with python and wget.


    Friday, January 14, 2011

    Amarok 2 or how to break a program

    In an earlier post I made a quick reference to Amarok 2. This program is a case study in what not to do. Amarok 1 was truly an amazing piece of software the people raved about. It was the best music player/manager out there and people were actually switching to Linux to use it. It was that good. To draw an analogy to another of my hobbies, it was the Lightroom of music players.

    But apparently it was hard to maintain under the hood, so the developers decided to scrap it and rewrite something they called Amarok 2. But when it was released it still had a ton of problems. A quick web search for Amarok sucks will bring up a lot of this history.

    Basically the authors seemed to decide that it was very important that your music player talk to a bunch of online services like telling people on Facebook, as if they cared, what you were listening to right that minute. What was less important apparently was actually playing music and especially being able to organize your collection.

    This was all 3-4 years ago. In the meantime, Amarok 2 is getting better, but it's lost its buzz and no one today ever raves about how good it is. Every time I use it to try to accomplish something, I get frustrated very quickly. Occasionally I will evaluate it to replace the original Amarok on my media PC and I quickly find something it won't do. For instance, I have a fair bit of music, so I'd like a playlist that would play a rotating collection, but not play things I've rated poorly and not play classical music. I'd like another playlist that would play things tagged "night" so when I'm trying to fall asleep, I'm not jarred awake by a Metallica song. Piece of cake with Amarok 1.4. Amarok 2 couldn't do it. It looks like finally in 2011 it may be able to do this. Maybe.

    Which brings me to today's frustration. I'm trying to organize some of my ripped CDs. I noticed that a title that is set incorrectly, so I changed it in Amarok 2. Immediately, for some reason, this CD goes from being listed under various artists to being listed under 15 different people. I click on it and find Amarok thinks it's a compilation because there is a menu item that says "Don't show under various artists." So if I click on that, what would you think would happen?

    1. Nothing
    2. Apparently nothing but now "Show under various artists" is back and clicking that gets things back the way they were
    3. It shows immediately under various artists
    4. The album totally disappears, it's album cover is assigned to another album, AND a scan of my collection won't bring it back
    If you answered #4, you would of course be right. This kind of thing is why I was still running a three year old operating system on my Media PC. And it's why I doubt I will ever like or really use this new version of Amarok.

    Sunday, January 9, 2011

    Western Digital TV Live Plus, first impressions

    I recently picked up a $100 device that I understand is being called a "Digital Media Receiver". I'm not sure that's a great name since it's very different than a home theater "receiver," but it does receive and play digital media, so I guess it's not too bad. There are lots of reviews of these types of devices on the web, but the basic features are:
    • Plays music, video, and photos
    • May be able to access data on a locally attached hard drive or a network share
    • Access to a number of internet services through plugins
      • Most noticeably this device connects to Netflix, Pandora, Blockbuster, and Facebook
    My aim is to replace a Linux based media PC that I've had in one form or another for 3-4 years. At one point I had a really nice setup on the Linux box with remote control and an LCD display of what was playing. After a catastrophic failure of the power supply, I eventually rebuilt the hardware, but stopped messing with the software when I reconstructed the ability to do HD output and digital audio. Getting the rest working again was just too much work.

    So anyhow, seeing little boxes like this made me think maybe I could get rid of the big PC with something roughly 1% of the volume. I read a few reviews and the consensus was that the WD box was pretty good, but not as good as a similar device from ViewSonic. The Boxee Box looks pretty cool too and I played with the software on my Mac. But unfortunately both these devices require an HDMI output and I have an old TV without only component inputs. An Apple TV is more limited, requiring me to run iTunes somewhere else in the house. So WD it was for me.

    So here are my initial thoughts:

    First, the music interface is really not that great. I was hoping for something as good as iTunes on a real computer. It's not even close. And iTunes isn't as good for me as my beloved Amarok 1.4 on a linux box. (Amarok 2 was junk when it came out and version 2.3 is getting to the point I might consider it).

    Second, while it can access data by a network share (I use a samba server), it's less functional than a directly attached hard drive (which I've only been able to test with a USB thumb drive). Basically the interface on a network share is just slightly glorified file interface so it really has no knowledge of my extensive music collection until I drill down into the folders. I think I can organize my way out of this though.

    Third, ocassionally accessing my network share doesn't work and you've got to try again.

    Fourth, Pandora, Netflix, and Mediafly (a podcast aggregator as best I can tell) access is pretty cool. Netflix doesn't deliver 5.1 sound yet, from what I understand. But an upgrade to a new API for their service is in the works.

    The interface to get to all of this is pretty nice though and uses a very simple remote control. The device also works well with a USB keyboard.

    So, I'm going to keep it and play around with ways of working around it's issues. It doesn't do the one thing I used to use my media PC for, playing music, as well or flexibly. But it does a lot more. And at $100, it's the kind of thing I replace every couple of years as I need to.

    I just wish I'd found this before I spent all the time, effort, and money to repair my media PC after the blow-up.

    Saturday, January 8, 2011

    Introduction

    This is my core dump.

    I intend this blog to be a collection of seemingly random information on how I use technology to solve the problems I'm interested in. My hope is that someone who's interested in the same problems I am may find it useful too. Here's some of my relevant interests:
    • Photography, especially post-processing
    • Home theater and digital media management
    • Geotagging and GPS tracking
    • iPhone software and it's cousins
    • SCUBA diving
    So, that's a pretty diverse collection, I reckon. To organize all the data I've collected over the years related to these activities, I've written a lot of simple little scripts. I'll post those along the way too.

    What you're not going to find is my musings on life, the universe, or anything. I've got other outlets for that.